
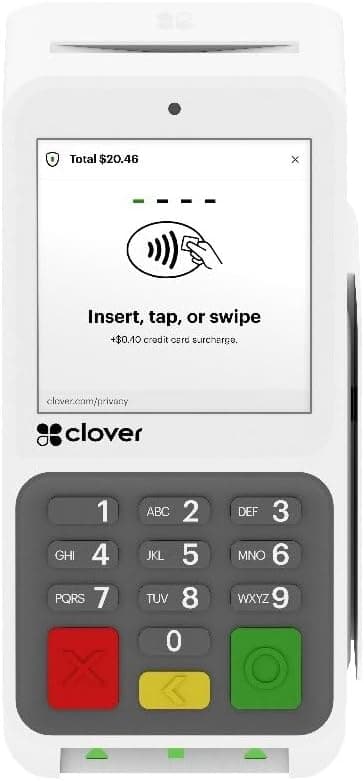
The Clover Compact is a small, all-in-one payment terminal that accepts cards, chips, and contactless taps at the counter or wherever your business goes. Getting it running is straightforward, and this quick start guide breaks the process into seven simple steps. Follow them in order and you will be accepting payments the same day your device arrives. If you get stuck, our Caribbean Payments team is based right here in Puerto Rico and happy to help. To see the full feature set, visit our Clover Compact page.
1.Unbox, charge, and connect
- Open the box and confirm you have the Clover Compact terminal, the power adapter, a USB-C cable, and a roll of receipt paper. Place the terminal on a stable, flat surface within reach of a power outlet.
- Plug it into power and let the battery reach at least 50% before your first setup. While it charges, load the paper: open the printer lid on top, drop the roll in so the paper feeds from underneath, leave a short tail out, and click the lid shut.
2.Power on and join Wi-Fi
- Press and hold the power button on the side until the screen lights up. The Clover Compact walks you through a short welcome flow — choose your language and accept the on-screen prompts to continue.
- When the network screen appears, tap Wi-Fi (or Settings → Network), select your business network, and enter the password. If you take payments on the go, the Compact also supports a mobile data (LTE) plan — ask our team to enable it so you stay online across the island.
3.Activate the terminal
- Once online, the Compact prompts for an activation code tied to your merchant account. Enter the exact code Caribbean Payments provided in your welcome details.
- The device then downloads your merchant profile, tax settings, and any apps included in your plan. Let it finish and restart if asked — this one-time step links every future transaction to your business correctly.
4.Configure your basics
- Open the Setup or Settings app to set your business name, time zone, tax rate, and tipping preferences. If you sell specific items, add a few products now so common sales ring up with one tap.
- Set who can access the terminal by creating employee logins and PINs. This keeps refunds and voids under control and gives you a clean record of who processed each sale.
5.Accept your first payment
- Open the Sale app, key in the amount, and present the terminal to your customer. The Clover Compact accepts tap, chip, and swipe, plus Apple Pay and Google Pay out of the box.
- Run a small test sale on a card you control first, approve it, then void it from the Transactions screen. A clean approval and reversal confirms your reader, network, and merchant account are all connected before real customers arrive.
6.Print and send receipts
- After each sale the Compact offers a printed, emailed, or texted receipt. Choose the default that fits your counter, and use the printer test in Settings if a receipt looks faint or misfeeds.
- Keep a spare paper roll on hand and reload it the same way you did during setup. Emailed and texted receipts are a fast, paperless option that many Puerto Rico customers now prefer.
7.Troubleshooting tips
- If a card is declined, ask the customer to try again or use another card — most declines come from the issuing bank, not the terminal. If the Compact drops offline, re-check Wi-Fi in Settings or switch to the LTE connection.
- Charge the device overnight, install updates when prompted, and restart it weekly for smooth performance. If anything still looks off, our local Puerto Rico support team can walk you through it by phone — you are never on your own.
Comparing devices before you commit? Browse our full lineup of card terminals to find the right countertop or handheld fit for your business.