
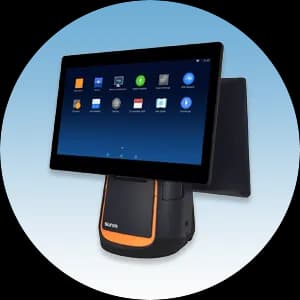
The Sunmi T2 is a dual-screen Android POS with a built-in thermal receipt printer and a customer-facing display, built for busy retail counters and restaurants. Getting it running is straightforward, and this quick start guide breaks the process into eight simple steps. Follow them in order and you will be ringing up sales the same day your device arrives. If you get stuck at any point, our Caribbean Payments team is based right here in Puerto Rico and happy to help. For a deeper look at the hardware, see the Sunmi T2 overview.
1.Unbox and connect power
- Open the box and confirm you have the Sunmi T2 terminal, the power adapter, the receipt paper roll, and any cash-drawer or scanner cables you ordered. Place the unit on a flat counter with the main display facing you and the second screen facing where your customer will stand.
- Plug the power adapter into the port on the base and into a wall outlet or surge protector. The T2 runs on wall power, so there is no battery to charge — as soon as it is connected you are ready to power on.
2.Power on and connect Wi-Fi
- Press and hold the power button on the side of the base until the main Android screen lights up. Give it a moment to finish its first boot.
- Swipe into Settings, open Wi-Fi, select your business network, and enter the password. Wait for the status to read Connected. A stable connection matters because both the payment app and the customer display sync through it — if your counter is far from the router, ask our team about adding an Ethernet adapter for a wired link.
3.Load the payment/POS app and sign in
- Open the POS or payment app that came pre-installed on your T2, or install it from the app link Caribbean Payments sent with your welcome details. Tap to launch it.
- Sign in with the merchant credentials tied to your account. The app then downloads your product catalog, tax rates, and pricing so every sale rings up correctly. Let it finish syncing before you move on.
4.Load receipt paper into the built-in printer
- The T2 has a thermal receipt printer built into the top of the base. Lift the printer cover latch and open the lid to expose the paper cradle.
- Drop in a standard 58mm thermal roll so the paper feeds from underneath and up toward the front. Pull a short tail of paper past the tear bar, then close the lid until it clicks. Thermal paper only prints on one side, so if a test slip comes out blank, flip the roll over.
5.Configure the customer-facing second display
- The rear screen shows customers their running total, tip prompts, and a signature or PIN pad. In your app settings, open the customer display or second-screen option and enable it.
- Choose what the customer sees — order items, your logo, or a promotional image between sales — and set your tip percentages if you accept tips. Rotate the base slightly so the second screen is easy for the customer to read and reach.
6.Run a test sale
- Before you serve real customers, confirm the whole flow works. In the payment app, key in a small amount such as $1.00 and start a sale. Have the customer display prompt appear, then tap, dip, or swipe a card you control.
- Approve the sale, then void or refund it from the transactions screen. A clean approval and reversal proves the reader, the network, the second display, and your merchant account are all working together.
7.Print and reprint a receipt
- After a sale, the T2 can print a receipt automatically or on request, and it can also email or text one if the customer prefers. Confirm your default in the app's receipt settings.
- Need a duplicate? Open the transaction from the history screen and choose Reprint. This is handy for end-of-day totals or when a customer asks for a copy later.
8.Tips and troubleshooting
- If the printer feeds blank paper, the roll is upside down — flip it. If a card is declined, most declines come from the issuing bank, so ask the customer to try again or use another card. If the second display goes dark, re-enable it in app settings and restart the terminal.
- Keep the T2 on a clean, dry surface, install updates when prompted, and restart it weekly to keep it fast. If anything looks off, our local Puerto Rico support team can walk you through it by phone — you are never on your own.
Comparing devices for your business? Browse our card terminals to see how the Sunmi T2 stacks up against other countertop and handheld options.